
During the 1960s, tie & dye became a popular choice in India as it represented ‘free choice’ which we today know as ‘hippie’ or ‘hipster’ look. It was new and thus people as always loved wearing unique garments. It may have started back then but every decade once or twice it makes a comeback as there are new designs to look forward to. This is why you can learn Textile designing courses online and start a textile design business in which tie & dye techniques are used is always booming.
There are other methods of fabric design methods like screen printing, block printing and natural dyeing but tie & dye is one of the easiest and most evergreen methods in the industry. This modern textile designing method was invented in 1909 as per written records by Luis C. Changsut in the United States.
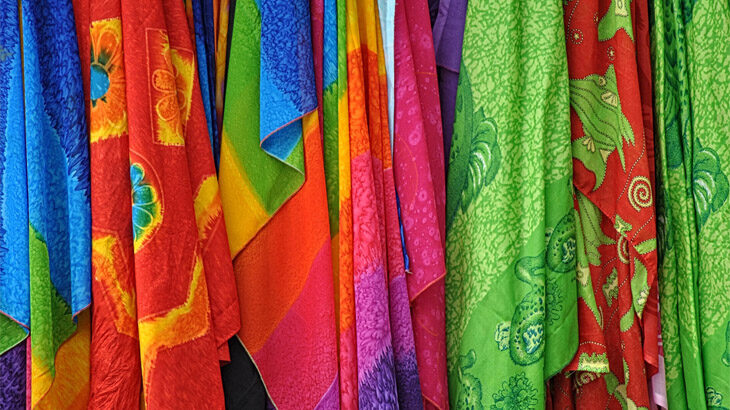
The basic steps involved in this fabric designing technique consist of twisting, folding, crumpling fabric, binding it using rubber bands or strings and then applying desired dyes. The colours mostly used during tie & dye are bold, bright and primary. Even the patterns used for tie & dye like a mandala, peace sign and spiral are among the first ones ever to be used for this type of textile designing.

Image Source- Pinterest
Tie & Dye Process by Textile designing courses online
1. Supplies
The supplies needed for tie and dye are very simple, easy to access and almost all of them can be found at our home. The first thing is to clear the workspace where you want to dye your fabric. The other supplies are dye, fabric, bucket, water, pair of gloves and the other basic tools required for you to get started.
2. Preparation
The are you have chosen for tie & dye is going to get messy so make sure that you choose a backyard or extra space which does not harm your home in case you are not able to clean it right away. Cover tables with plastic and if you feel it is necessary, then cover the floor as well. Working outside the main areas of your home can give you more freedom.
According to Textile designing courses online, prepare the dye mixture of your choice. Use a container you see fit or bucket to mix dye so you can use it when needed in future.
Prepare your fabric. Wash your fabric once before using it so you can starch and the fabric can shrink which always happens with new fabric. This is for all new clothing items; they should be prewashed in case they have starch or chemicals that may prevent the dye from penetrating.

Image Source- Supmares
3. TIE the Fabric
When your area is prepared and your tools are ready to create a tie-dye pattern, there are many different ways including colours, patterns and more. It is best to start simple and build confidence with the desired outcome.
You can choose rubber bands as they are the most opted and easy way to tie fabric for dyeing purposes. The idea here is that the tied parts of fabric will not absorb the dye leaving a pattern in the final product.
4. Immerse in DYE
After tying the fabric, get ready to put it in the bucket of dye to colour it in your desire. You can use tongs to check if the colour is right or not before proceeding to the next step. If your desired colour is not on the fabric yet then leave the fabric in the bucket for some more time to dye it. You can also check the instructions on the packet of colour you brought for more information.

Image Source- Sohu.com
5. Rinse
When you finally get the colour you want on the fabric, remove the fabric from the bucket and rinse it in cold water. You can use a hose or put the dyed fabric in a bucket of cold water.
6. Repeat the Process According to Textile designing courses online
If you are thinking about adding multiple colours on the same fabric then repeat the above process. But you have to plan the process beforehand to use multiple colours as colours mix giving birth to a new colour.
7. Dry
Lastly, when the colours are added, let the fabric dry. You can put the fabric in a plastic bag before letting it dry so the colours don’t make a mess on the floor. When the colours are set and you are happy with the outcome, watch the fabric again and iron it.

Image Source- The Adair Group
Fabric Design Methods Using Tie & Dye – Textile Designing Courses Online
There are many methods you can use for tie-dye textile design. In different places of the world, these techniques have different names too. The most basic tie & dye techniques used in India are:
1. Marble Tie & Dye
This type of tie and dye technique creates patterns which can remind you of marbles. The patterns take their shapes which is basically how marbles are found. You can use this tie & dye technique to create patterns on kurtis, t-shirts, sarees and other garments.

Image Source- Westbeach
2. Bandhani Tie & Dye
This tie and dye method is practised primarily in Gujarat and Indian women love Bandhani garments, especially sarees. This technique is very famous all over the country for sarees as you can create many types of patterns using only this one technique.

Image Source- IndiaMART
3. Knotting Tie & Dye Textile designing courses online
The key here is to make a knot and as many as you want. It ha no particular pattern so you can use your creativity of making knots to create a unique pattern each time.

Image Source- Things to Make and Do
Want to learn more applications of colours and techniques to create patterns on garments? Then join our Textile designing courses online. Enrol in the fabric designing course from home and get mentored by 4-time national award-winning fashion designer, Neeta Lulla.